There are umpteen ways to capture screenshots of web pages in your Google Chrome browser. You can use the good-old Print Screen key (or Cmd+Shift+4 on a Mac), get a snapshot utility like SnagIt or the Windows Snipping Tool, or even better, get a dedicated Google Chrome extension like Smartshot that lets you capture the screen and annotate it.
What some may not know is that the newer versions of Google Chrome have a built-in screenshot capabilities allowing to perform screen captures without install any extensions. The more interesting part is that you can even add device frames to your captured images for more realistic mobile screenshots.
Screenshots
How to Screen Capture in Google Chrome
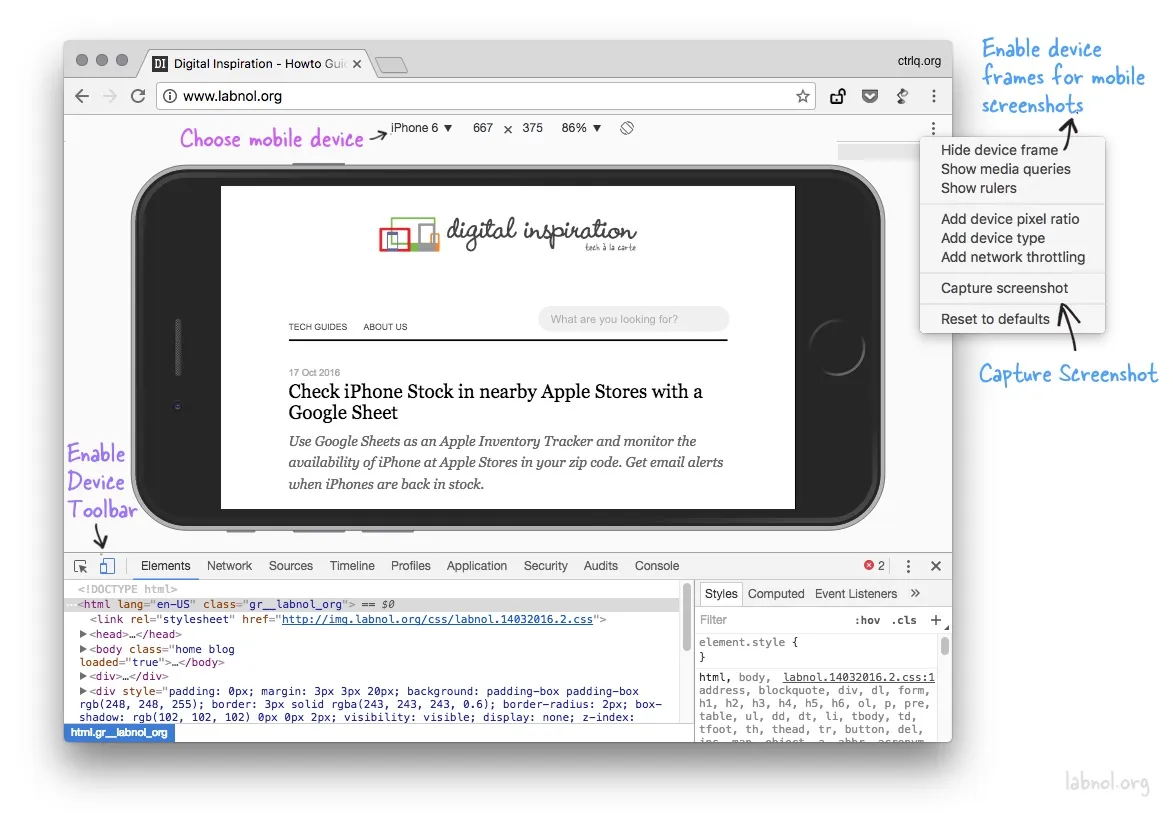
To get started, open any web page inside Google Chrome and choose Settings -> Tools -> Developer Tools. Alternatively, press F12 on Windows or Cmd+Opt+I on a Mac to directly open the Chrome Dev Tools window.
Next, toggle the Device Toolbar button so that it turns blue. Now select any mobile device from the built-in list of device presets. Set the zoom to 100% and click the Rotate icon to change the orientation (default is portrait mode).
The stage is set. Click the 3-dot menu in the right and enable device frame. Next, choose Capture Screenshot from the same menu to save a device screenshot in PNG format.
Capture Screenshots in Firefox
You can capture screenshots of web pages in Firefox as well without installing any add-ons. Unlike Chrome which can only capture visible region, Firefox developer tools can take a snapshot of the entire web page and automatically saves it in your default downloads folder.
Open Web Developer tools inside Firefox and, under Settings, enable the option - Take a screenshot of the entire page. Firefox will add a camera icon to the developer toolbar letting you capture screenshots with one-click.


