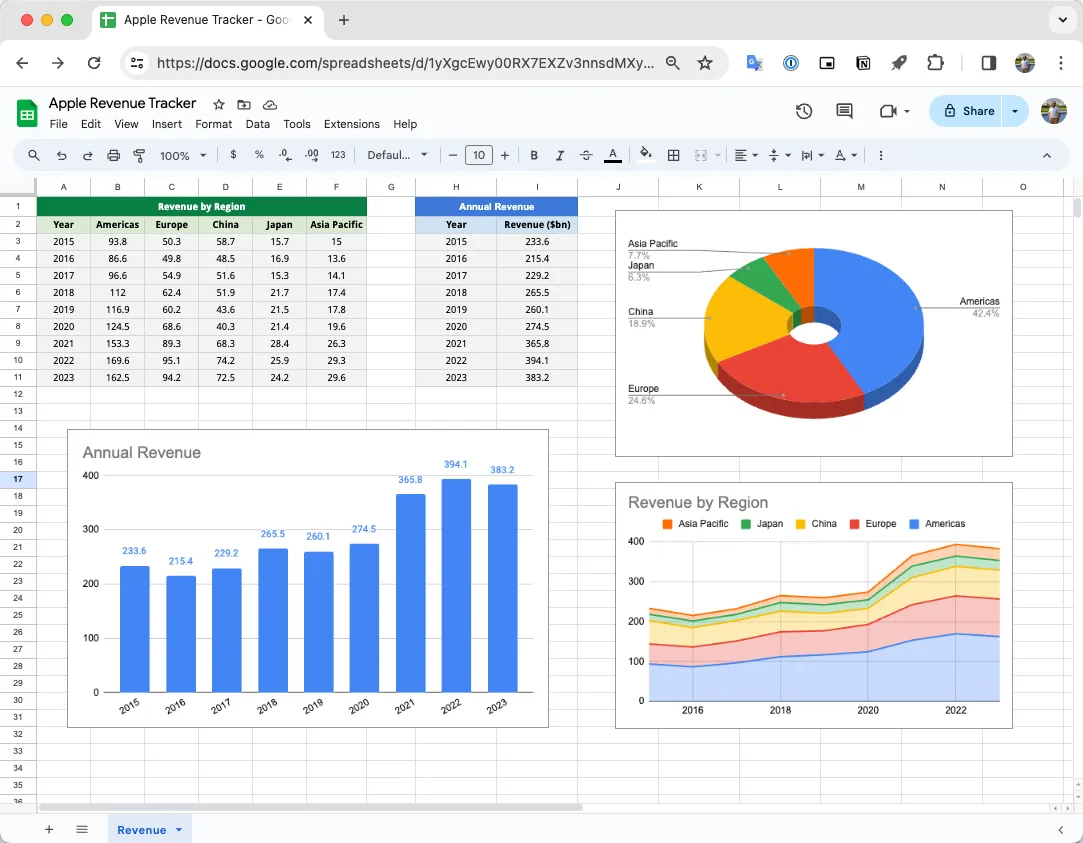
The finance team has created a revenue dashboard inside Google Sheets to track the company’s sales performance over time. The dashboard has data tables and charts showing overall revenue and regional performance trends.
Here’s a screenshot of the Google Sheets dashboard:

The finance team wants to send a snapshot of this dashboard to the company’s management every Monday morning. They would like to automate this process so that the screenshot is captured automatically and sent via email without any manual intervention.
Let’s see how we can easily set up this automation with the help of Email Google Spreadsheets add-on. You can define the area of the Google Sheets dashboard that you want to capture, using the A1 notation, and the add-on will automatically take a screenshot of that area and send it via email to the recipients.
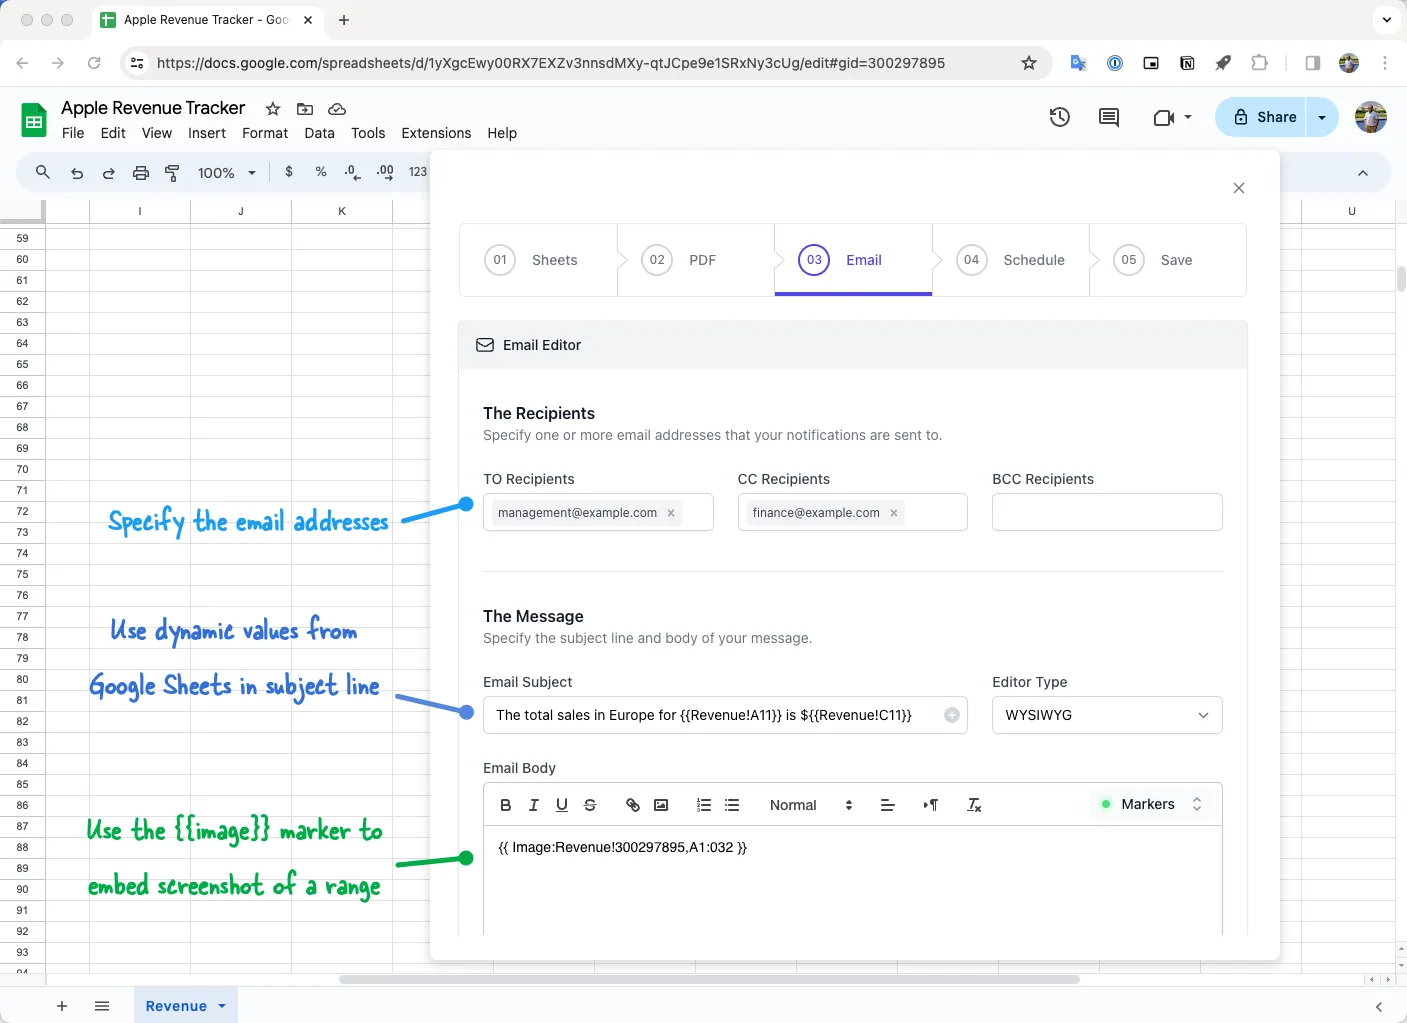
Open your Google Sheets dashboard, go to Extensions > Email Google Sheets > Open to launch the app. Click on the Create Workflow button and move to the Email step of the workflow.

Automate Screenshots of Google Sheets
Go to the Email step of the workflow and specify the email addresses of the recipients. The subject and body of the email can include markers that will be replaced with the actual values from the Google Sheets dashboard.
For instance, if you wish to include the value of a cell in the email, you can use the marker {{SheetName!A1}} where SheetName is the name of the sheet and A1 is the cell address.
How to Insert Screenshot Markers

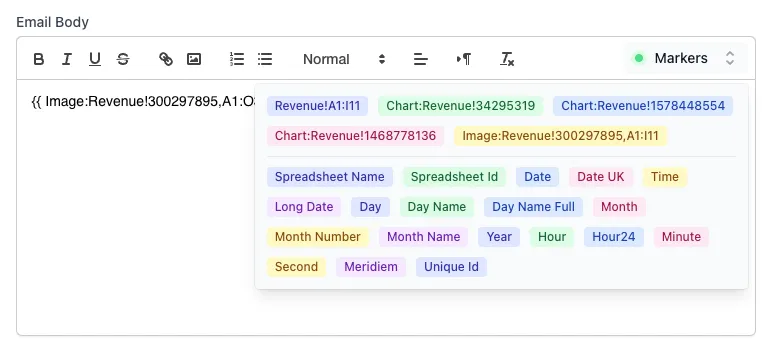
Expand the Markers section of the Email body and click on the Image marker for the sheet whose screenshot you want to include in the email. The marker will be added to the email body.
The format of the screenshot marker follows this pattern:
{{ Image:SheetName!SheetId,A1:B10 }}The SheetName is the name of the sheet, and A1:B10 is the range of cells that you want to capture in the screenshot. The SheetId is the unique id of the sheet that is used to identify the sheet in the Google Spreadsheet. The id will not change even if you rename the sheet.
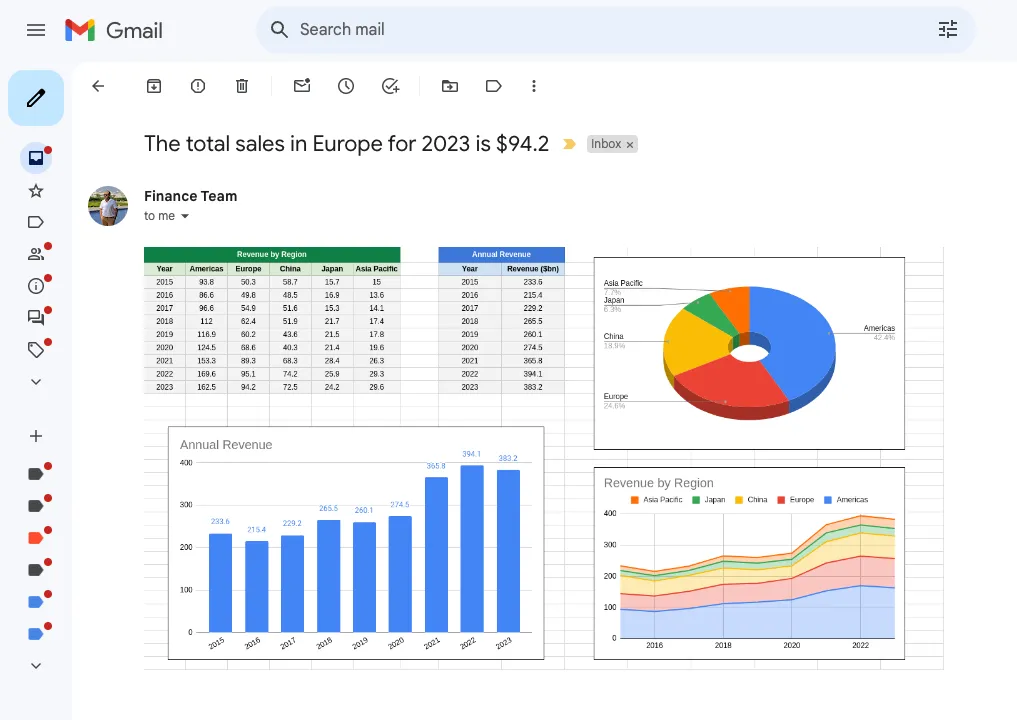
Once the message is ready, click the Preview button to send a test email to yourself. Here’s how the email will look like:

If everything looks good, click the Continue button and set the schedule for the workflow.
Install Email Google Spreadsheets


