The Document Studio add-on helps you automatically send text messages when a new Google Form is submitted or when new rows are added to Google Sheets. You can thus build workflows that send text reminders when the invoices are due. Or you can get notified instantly when people fill out your Google Forms.
The SMS Workflow
The text messages in Document Studio are sent through Twilio but the app can be integrated with any SMS service as long as the service offers an API for sending text messages programmatically. You may use TextMagic, SimplyTexting, Vonage, ClickSend, RingCentral, or any SMS service of your choice.
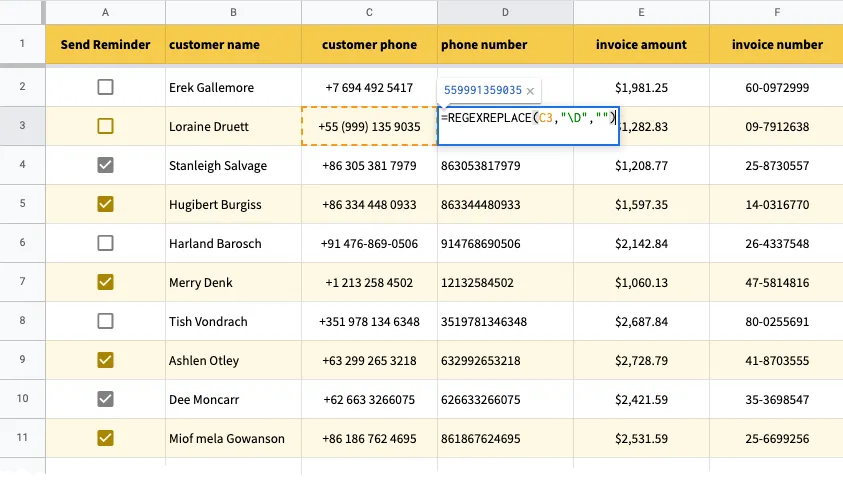
For this example, we have a Google Sheet that contains the customer’s name, phone number, invoice number and the amount that is due. Column A of the Google Sheet, titled Send Reminder contains checkboxes and the SMS should be sent only for rows where this checkbox is selected.
Format the Phone Numbers
The phone numbers in Column D should conform to the E.164 international format and can have a maximum of 15 digits.
[+][country code][area code][local phone number]We have added another column in the sheet, titled Phone Number and this uses a Google Sheets function to remove all non-numeric characters from the customer’s phone number. Paste this function in the D2 cell.
=BYROW(C2:C11,LAMBDA(Phone, REGEXREPLACE(Phone,"\D","")))If you prefer using ArrayFormulas instead of the new BYROW function, the modified formula would be:
=ArrayFormula(REGEXREPLACE(C2:C11,"\D",""))1. Build SMS Workflow
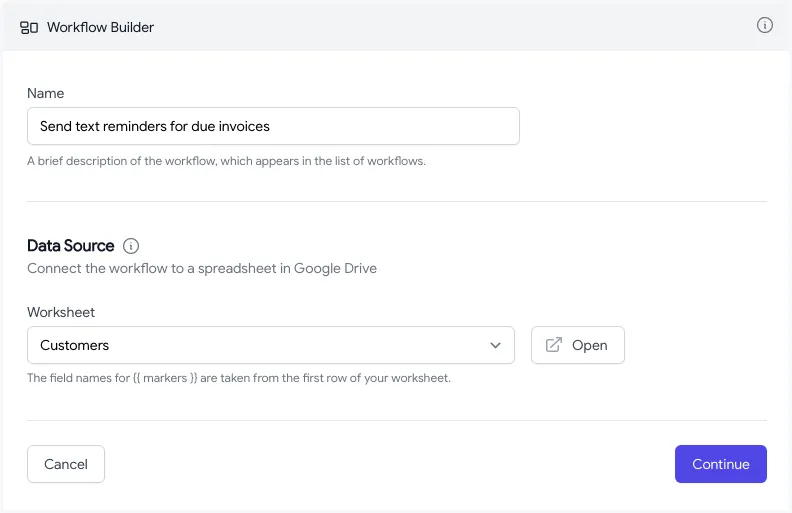
Now that our source data in Google Sheets is prepared, let’s build a workflow to send SMS messages. Launch Document Studio and create a new workflow.
2. Set the Send Criteria
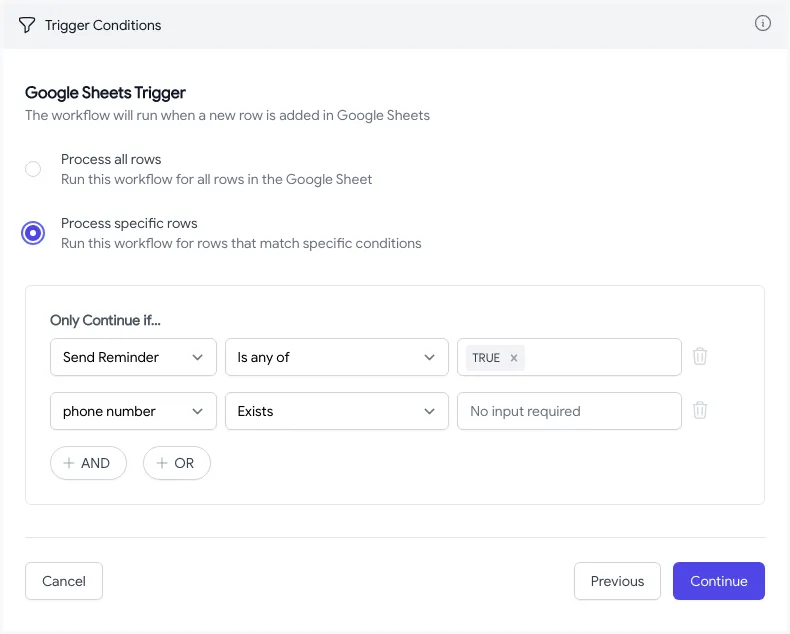
On the next screen, choose the Process specific rows option and specify the criteria when invoice reminders should be sent over SMS. We’ve specified two conditions in our example:
- The Checkbox should be selected or
TRUE - The phone number field should not be blank
3. Configure SMS Service
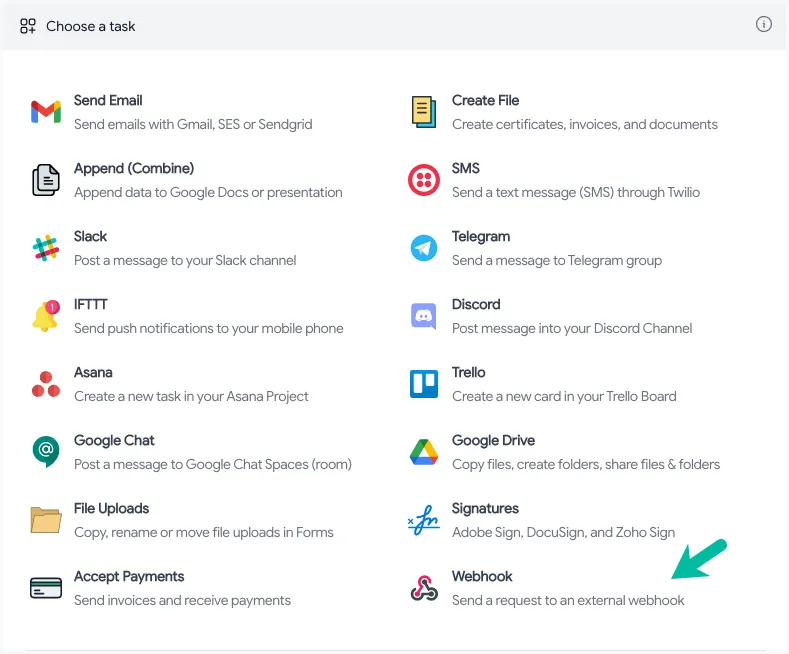
Next, proceed to the Tasks screen and choose Webhooks from the list of services. We’ll essentially make an HTTP POST request to the SMS service provider’s API to send the text message.
And this request will be different for each SMS service depending on their API endpoints.
3a. Send SMS with TextBelt
Go to textbelt.com and create an API key. You may send the first SMS message for free using textbelt as your API key.
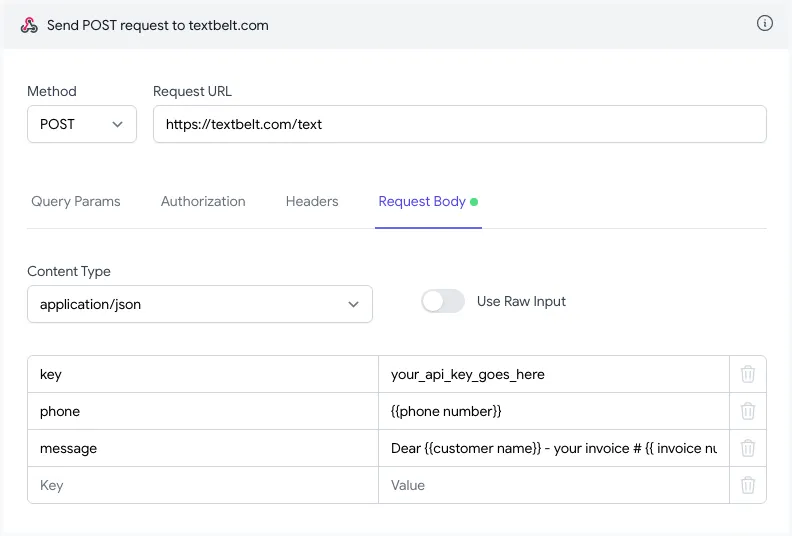
Inside the Webhook service, set POST as the request method and the request URL as https://textbelt.com/text.
Switch to the Request Body tab and set the content type as application/json. The message field contains the text Dear {{customer name}}- your invoice #{{ invoice number }} for {{invoice amount}} is due. while the phone field contains the values from the {{ phone number }} column of the Google Sheet.
3b. Send SMS with TextMagic
Create an account on TextMagic.com, go to the API settings page and click the Add new API key button to generate a new secret key.
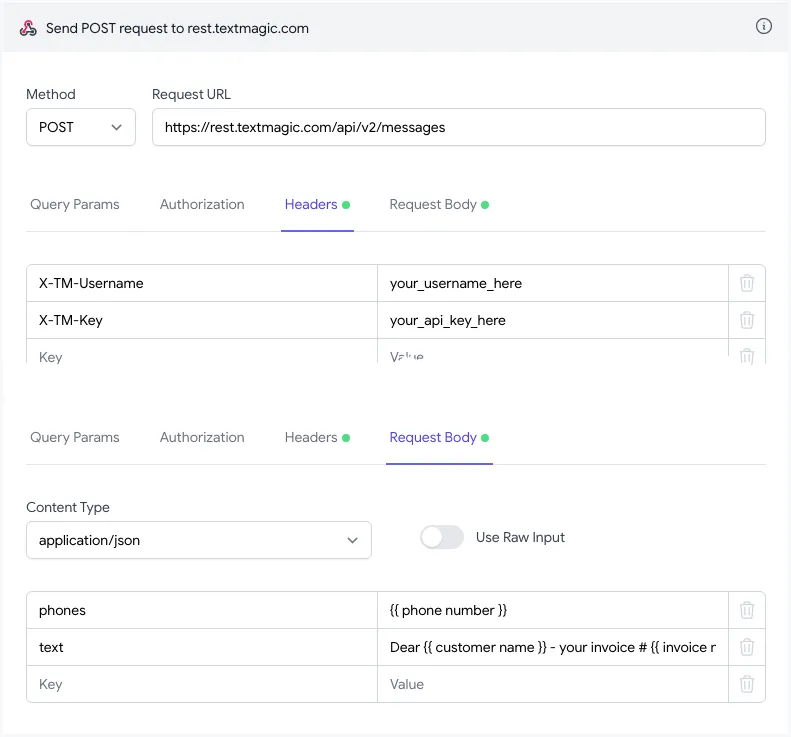
Set the request URL as https://rest.textmagic.com/api/v2/messages and add two header fields - X-TM-Username and X-TM-Key to include the username and API key respectively. The request body should have the parameter phones for the recipient’s phone number and text for the SMS body.
You may optionally include the sendingDateTime parameter in the request body to schedule text messages and send them at a later date. Check the API docs for the full list of parameters.
3c. Send SMS with ClickSend
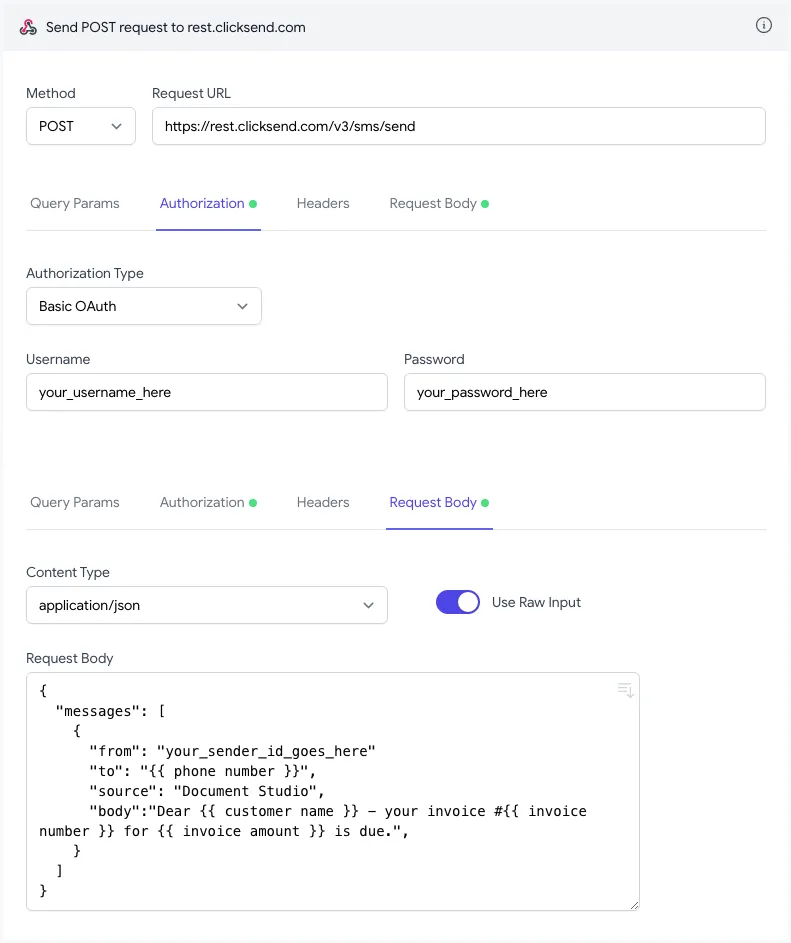
If you prefer the ClickSend service for sending text messages, put https://rest.clicksend.com/v3/sms/send in the URL field with the request method set as POST. Choose Basic OAuth under the Authorization tab and provide your username and API key in the user and password fields respectively. You may get the credentials from your ClickSend dashboard.
For the request body, turn on the Use Raw Input option and the content type set to application/json. Put the following JSON in the body field.
The Sender ID can either be a business name or mobile number and can be used by the recipient to identify who sent the message.
{
  "messages": [
    {
      "from": "your_sender_id_goes_here",
      "to": "{{ phone number }}",
      "body": "Dear {{ customer name }} - your invoice #{{ invoice number }} for {{ invoice amount }} is due.",
      "source": "Document Studio"
    }
  ]
}
4. Activate the SMS Workflow
Now that you have configured the workflow to send SMS with your preferred texting app, go to the Save screen inside Document Studio and choose Save and Run to send the text messages to your customers.
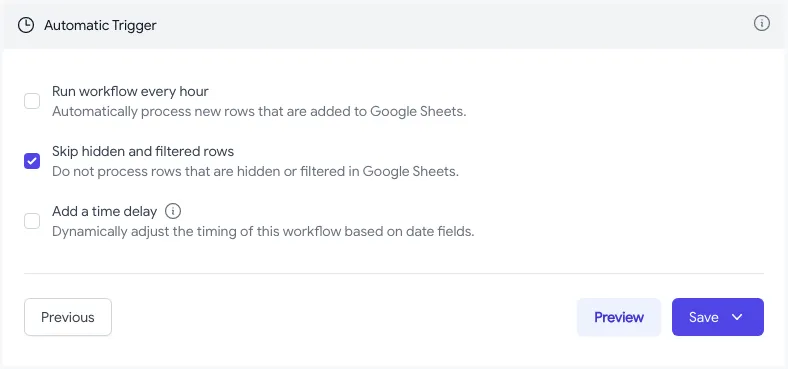
You may also enable the Time Delay option to delay the sending of text messages until a condition is met. For instance, you may choose to send text messages only when the invoice due date is past 5 days.
Also see: 🐘 Automate Workflows with Google Sheets


