This tutorial explores the different options for inserting images in Google Sheets. We’ll also discuss the advantages and limitations of each method.
- Use the
IMAGEfunction to insert images into any cell of your Google Sheets. - Use the
Insertmenu in Google Sheets to directly insert images into cells. - Use the
CellImageBuilderAPI to programmatically insert images with Google Apps Script.
Use the IMAGE function
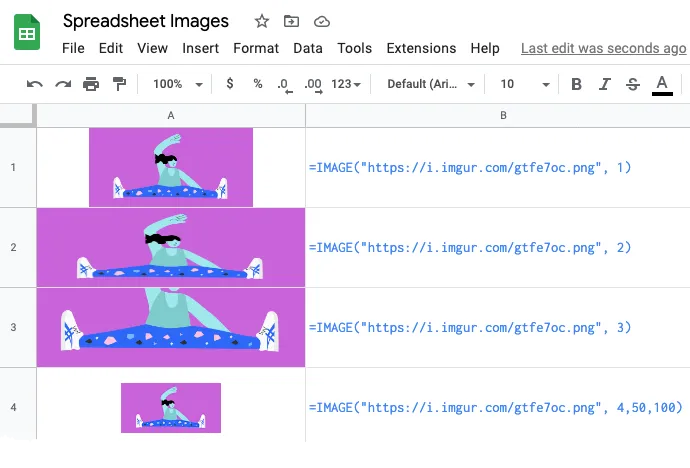
To add an image to a cell, highlight the cell and click F2 to enter the formula mode. Next, enter the formula =IMAGE("URL") where URL is the public web address of that image.
For instance, the following formula will insert a free image in your Google Sheet.
=IMAGE("https://i.imgur.com/gtfe7oc.png")Google Sheets, by default, will scale the image to fit inside the area of the selected cell but you can easily change the default settings by adding another parameter to the IMAGE function.

With mode (second parameter) set to 2, the modified formula =IMAGE("URL", 2) will stretch the image to fit inside the selected cell occupying the entire height and width of the cell. This may distort the image if the aspect ratio of the image does not match the aspect ratio of the cell.
Set the mode value to 3, as in =IMAGE("URL", 3), and the image will be embedded into the cell using the original dimensions of the image. Uf the cell is too small to fit the image, the image will be cropped.
Finally, You can also specify the height and width of the image in pixels by setting the mode to 4. For instance, the formula =IMAGE("URL", 4, 100, 100) will embed the image at 100x100 pixels.
| Description | Image Formula Example |
|---|---|
| Resize image to fit the cell | =IMAGE(“URL”, 1) |
| Stretch image to fit the cell | =IMAGE(“URL”, 2) |
| Use image’s original size | =IMAGE(“URL”, 3) |
| Specify custom size of the image | =IMAGE(“URL”, 4, heightInPixels, widthInPixels) |
If you are getting parsing errors, you are either using a non-existent image or you may have missed adding quotes around the image URL inside the Image function formula.
Use the Insert menu in Google Sheets
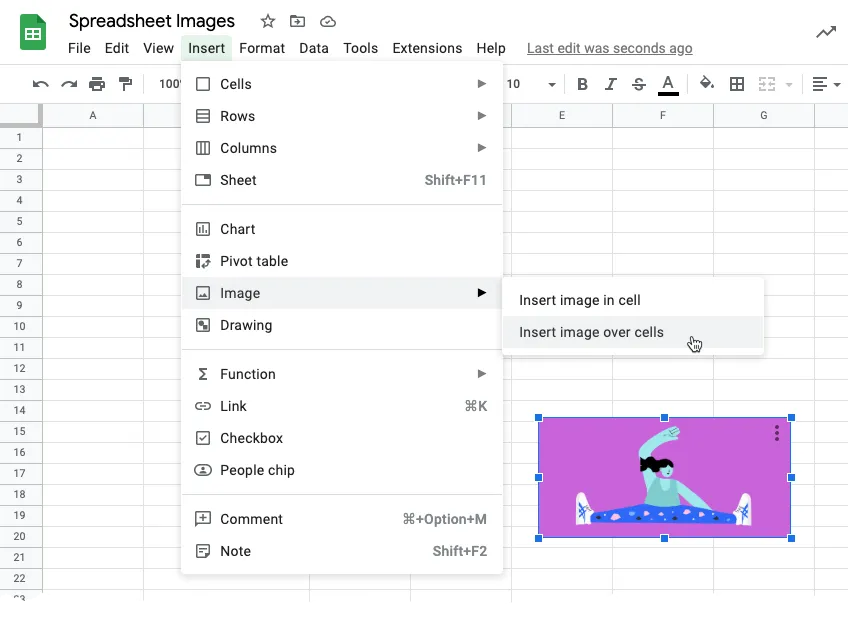
You can insert images from your computer into Google Sheets by using the Insert > Image menu in Google Sheets. Choose the Insert image over cells option and select the image you want to insert.

Unlike the IMAGE function that restricts you to a specific cell, this approach lets you place the image anywhere inside the Google Sheet. The image placed in this manner can be resized easily by dragging the blue handles and you can provide an Alt text to the image for better accessibility.
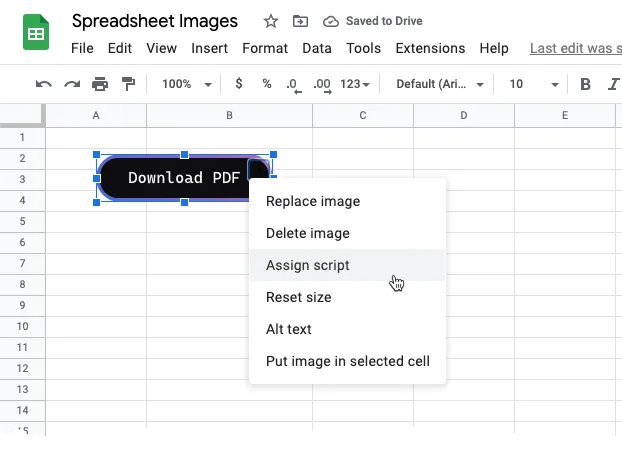
The other advantage of this approach is that you can assign a Google Script to the image that will be executed when someone clicks the image. For instance, you may add a button in the Google Sheet and assign a script that instantly downloads the sheet as a PDF file to your computer.

Add Images through Apps Script
Developers can also add images in Google Sheets programmatically either using the setFormula() method or the CellImageBuilder API of Google Apps Script.
Using the setFormula() method
This script will insert a public image from the web into the first cell (A1) of the active Google Sheet. Since we have not specified the mode in the Image formula, the image will be resized to fit the cell while maintaining the aspect ratio of the image.
const insertImageWithFormula = () => {
  const imageUrl = 'https://i.imgur.com/gtfe7oc.png';
  const sheet = SpreadsheetApp.getActiveSheet();
  const cell = sheet.getRange('A1');
  cell.setFormula(`=IMAGE("${imageUrl}")`);
  SpreadsheetApp.flush();
};
Using the CellImageBuilder API
This is a relatively new feature of Google Apps Script that allows you to add images to a cell. You can specify the image URL, the alt text and the image will be resized automatically to fit in the specified cell.
It is recommended to use the try-catch block else the function may fail if the image URL is invalid or not accessible.
const useCellImageBuilder = () => {
  try {
    const imageUrl = 'https://i.imgur.com/gtfe7oc.png';
    const imageDescription = 'Image of a person wearing spectacles';
    const cellImage = SpreadsheetApp.newCellImage()
      .setSourceUrl(imageUrl)
      .setAltTextTitle(imageDescription)
      .build()
      .toBuilder();
    const sheet = SpreadsheetApp.getActiveSheet();
    const cell = sheet.getRange('A11');
    cell.setValue(cellImage);
  } catch (f) {
    Browser.msgBox(f.message);
  }
};
The CellImage API also lets you use base64 encoded image strings instead of the image URL.
data:image/png;charset=utf-8;base64,You can use Google Apps script to convert an image to base64 encoded string and pass the base64 string string to the CellImageBuilder API.
const useCellImageBuilderWithDataURI = () => {
  const dataImageUri = 'data:image/png;base64,iVBORw0KGgoAAAAeCAYAA7...';
  const imageDescription = 'Image credit: wikimedia.org';
  const cellImage = SpreadsheetApp.newCellImage()
    .setSourceUrl(dataImageUri)
    .setAltTextTitle(imageDescription)
    .build()
    .toBuilder();
  SpreadsheetApp.getActiveSheet().getRange('A11').setValue(cellImage);
};
The script would require access to either the googleapis.com/auth/spreadsheets.currentonly (access current spreadsheet only) or googleapis.com/auth/spreadsheets (access all Google Spreadsheet in your Google Drive) scope to use any of the Spreadsheet functions.


