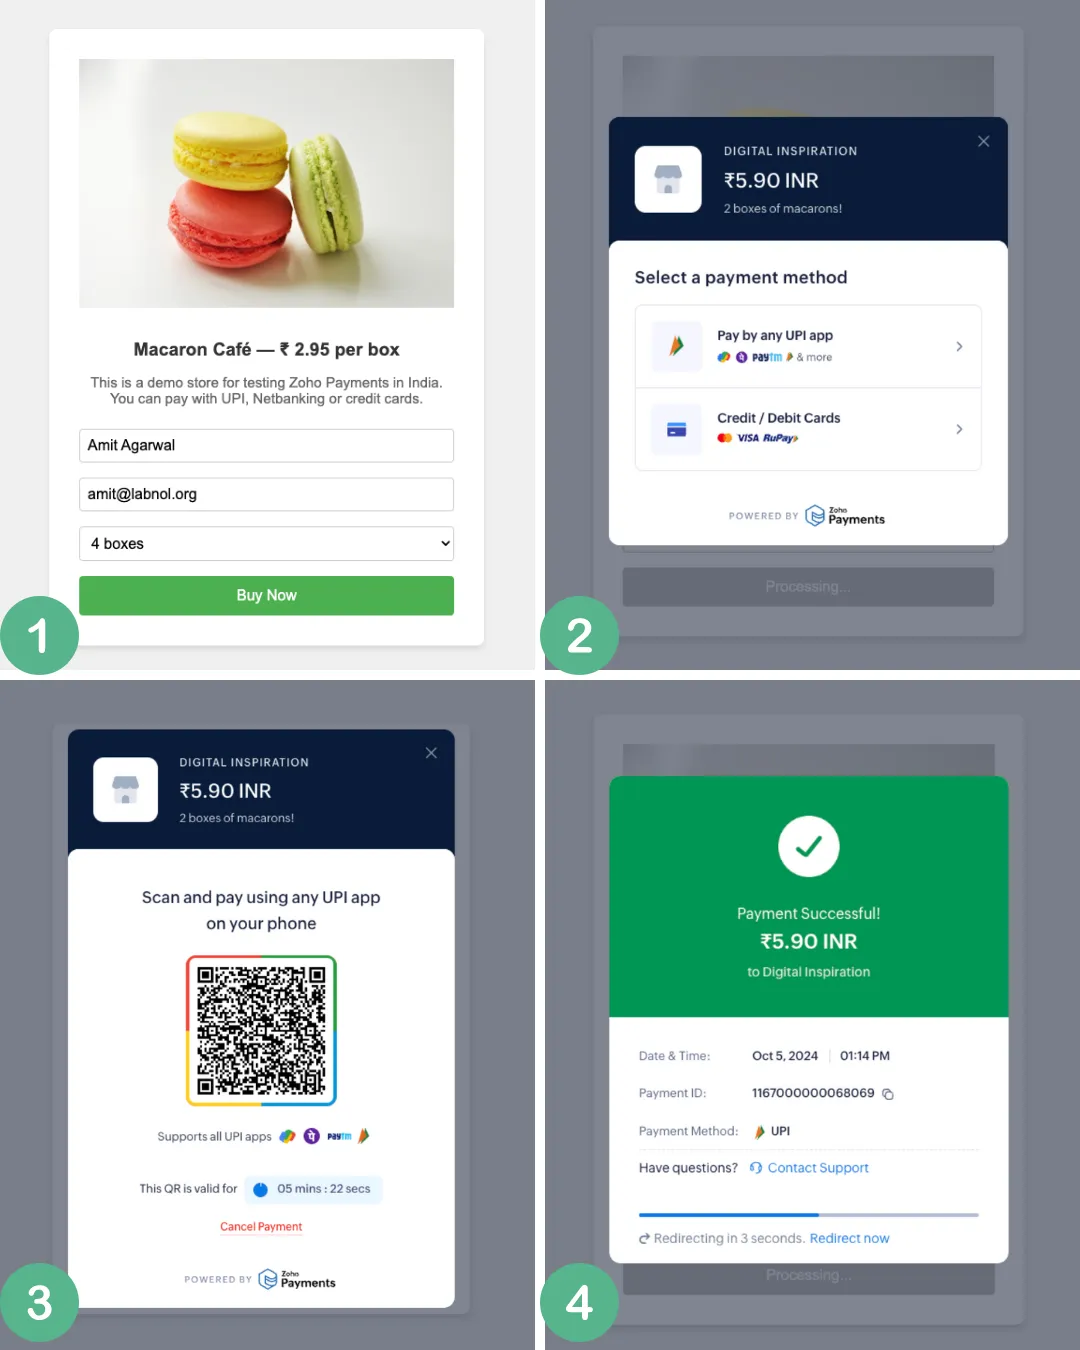
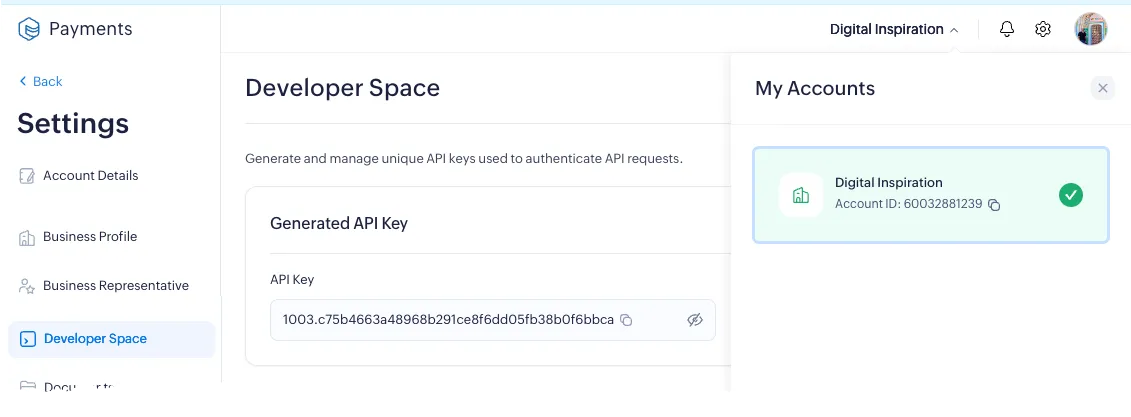
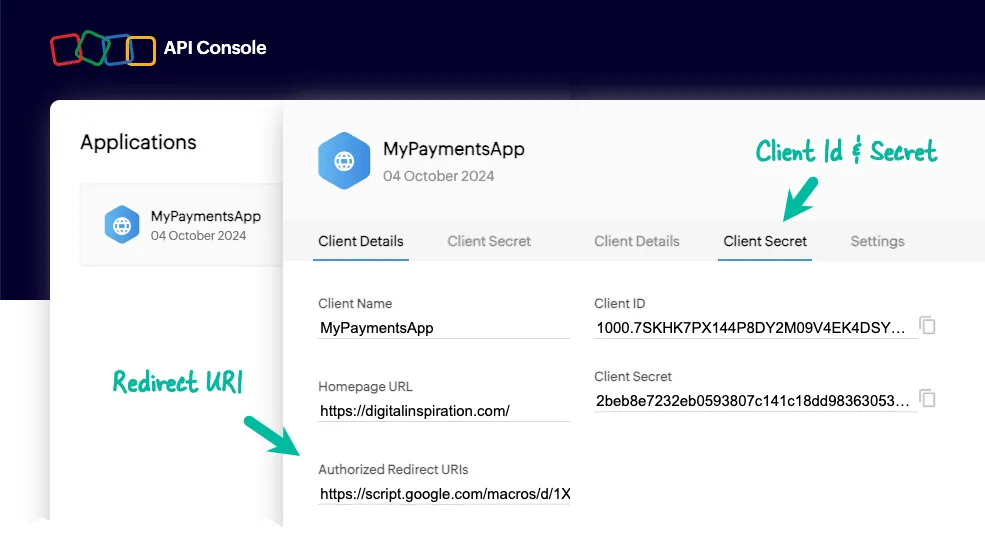
Zoho Payments is a new payment gateway that lets you accept payments on your website. You can visit this sample store to see the Zoho Payments widget in action.
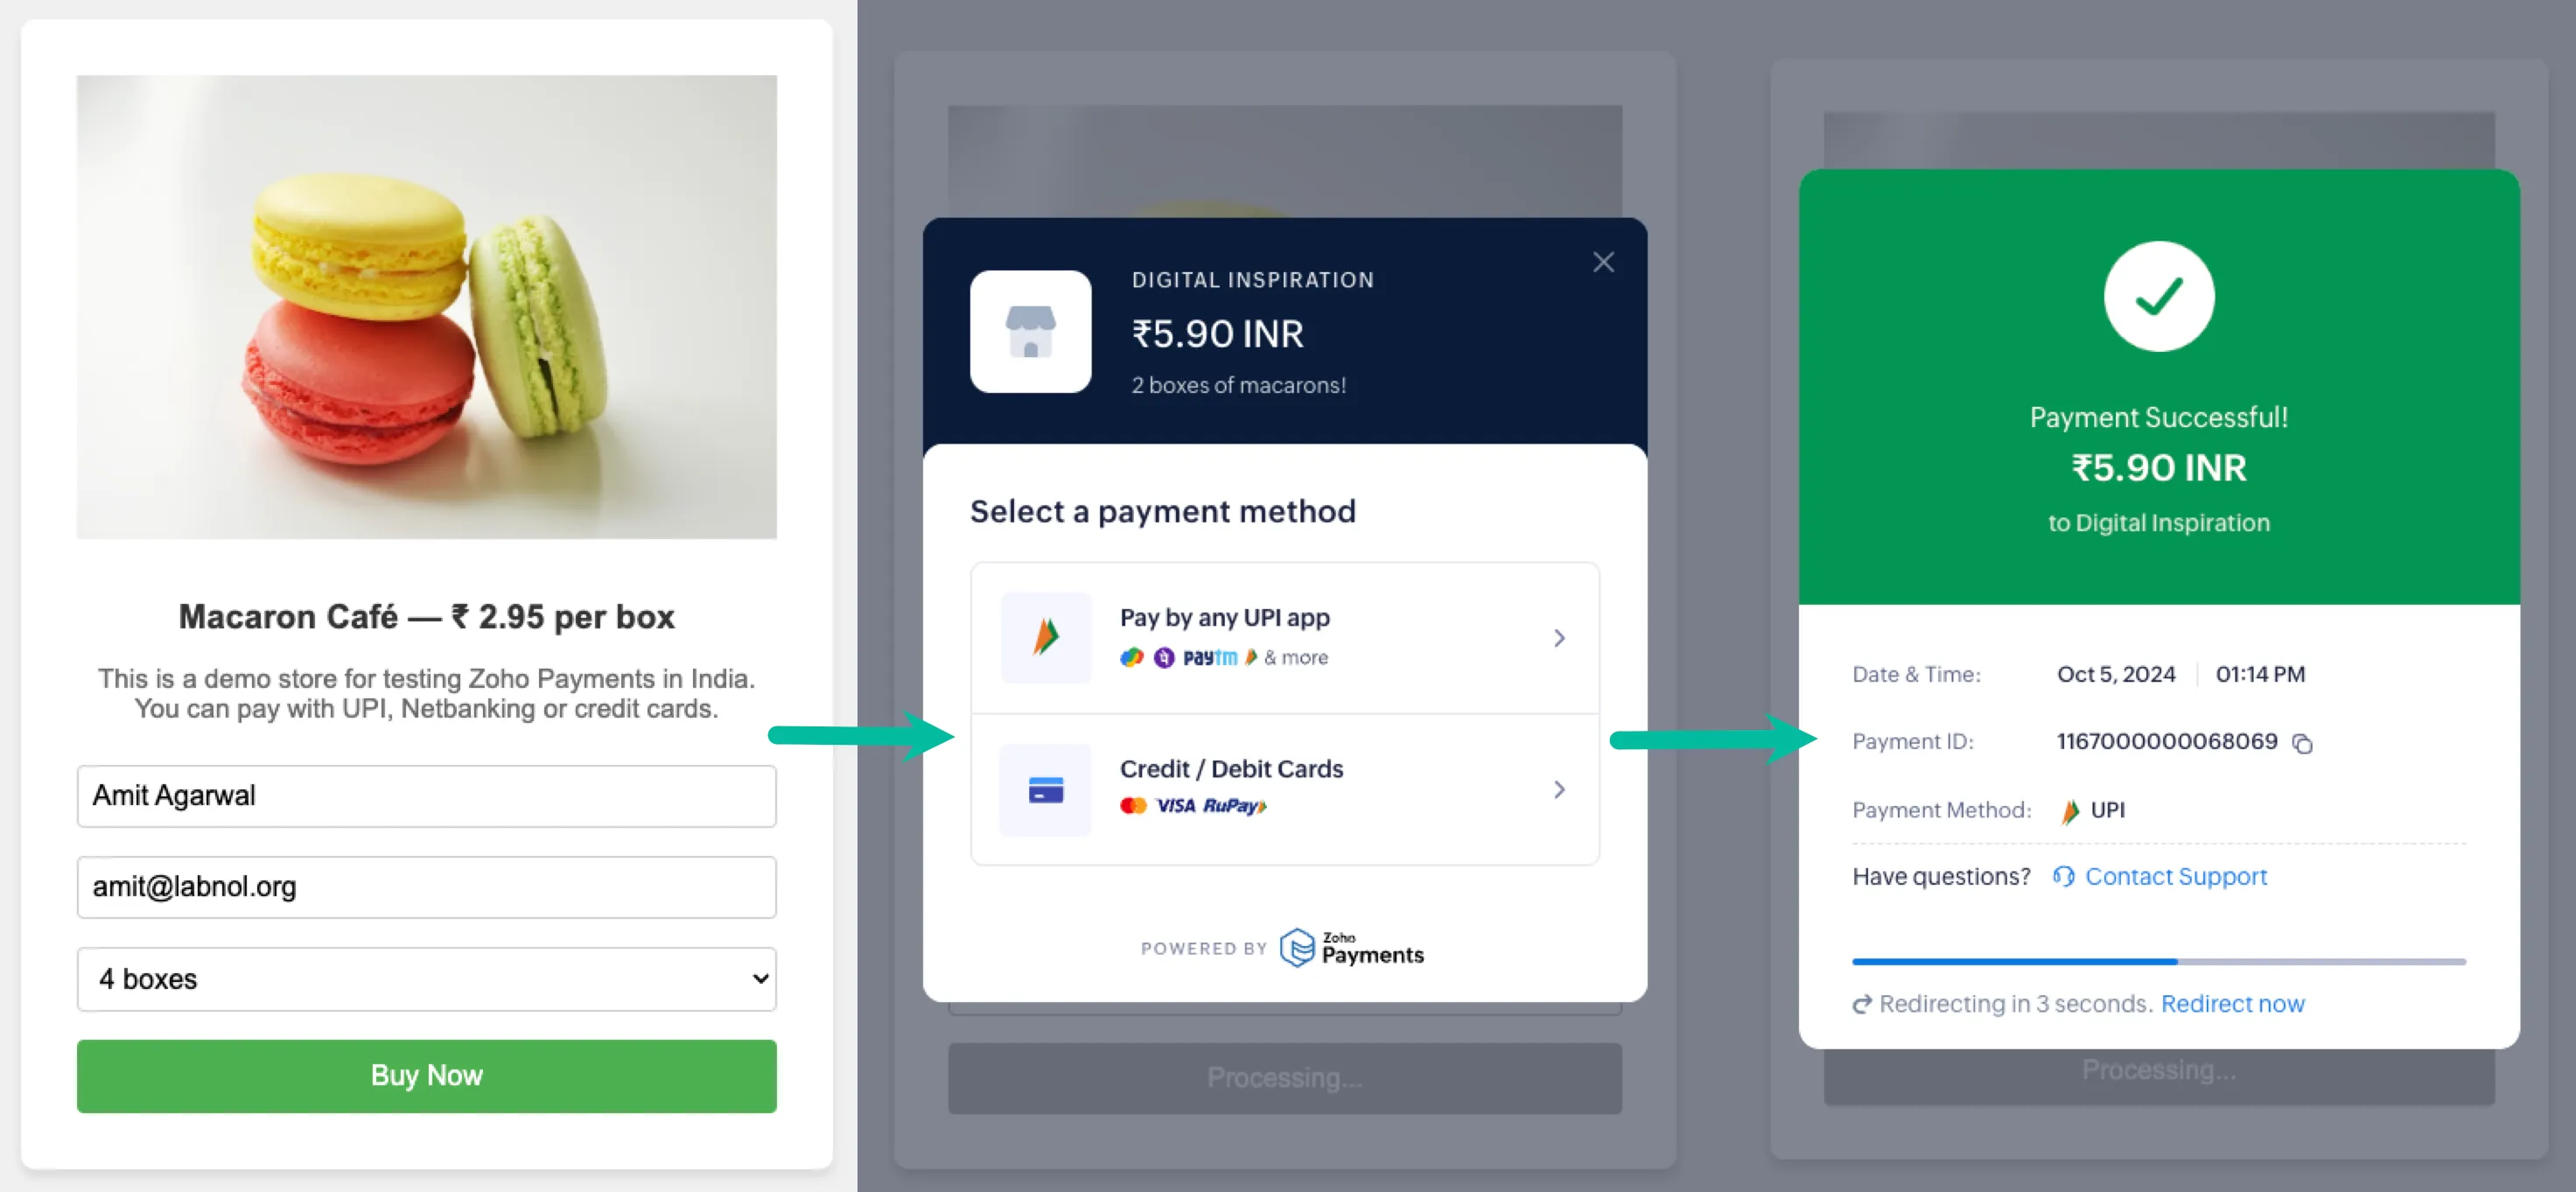
Unlike Stripe or RazorPay which are more mature payment gateways, Zoho Payments only supports domestic payments in INR (₹). In the initial release, merchants can only accept one-time payments and customers can pay you with UPI, Net Banking, and Credit Cards.
The onboarding process is simple and, once you have uploaded your KYC documents, your account is approved within few business days. There’s no transaction fee for UPI payments while credit card transactions are subject to a 2% fee (excluding GST)
How to Accept Payments with Zoho Payments
In this tutorial, we’ll create a simple payment page in Google Apps Script and accept payments on our website using Zoho Payments.
Assuming that you have signed up for Zoho Payments, you can visit the dashboard to find your “Account ID”. Next, go to Settings > Developer Space to find your “API Key”.
Setting up the Google Apps Script
Open the Google Script project and make a copy in your Google Drive.

Inside the Apps Script editor, go to function dropown and select printZohoPaymentsRedirectUrl. Run the script and you should see a URL in the console window.
Go to your Zoho API Console api-console.zoho.in and add a new client. Set the Client Type to Server-based Applications and paste the Redirect URL from the previuos step in the Authorized Redirect URLs field. Give your application a name like MyPaymentsApp and click on Create. Make a note of the Client ID and Client Secret as we’ll need them in the next step.
Go back to the Apps Script editor and paste the Client ID and Client Secret in the corresponding variables. You will also need to paste your Account ID and API Key in the code.
Next, run the printZohoPaymentsAuthUrl function to generate the authorization URL. Open the URL in a new tab, allow the app to access your Zoho Payments data and you should see a success message. We are limiting the scope of the application to ZohoPay.payments.CREATE so that our application can only create payments but not read or update any other data.
Once the application is authorized, click the Deploy button and select New Deployment. Select the type as Web app, set the Execute as to Me and Who has access to Anyone. Click on Deploy and you will get the URL of your web payments page. Anyone can now make a payment by visiting this URL.
The Techical Details
The app uses the OAuth2 library to handle the authorization process and generate the access token for connecting to the Zoho Payments API.
const getZohoPaymentsService_ = () => {
  return OAuth2.createService(ZOHO_SERVICE_NAME)
    .setAuthorizationBaseUrl('https://accounts.zoho.in/oauth/v2/auth')
    .setTokenUrl('https://accounts.zoho.in/oauth/v2/token')
    .setClientId(ZOHO_PAYMENTS_CLIENT_ID)
    .setClientSecret(ZOHO_PAYMENTS_CLIENT_SECRET)
    .setCallbackFunction('zohoOauthCallback')
    .setPropertyStore(PropertiesService.getScriptProperties())
    .setCache(CacheService.getScriptCache())
    .setParam('response_type', 'code')
    .setScope('ZohoPay.payments.CREATE')
    .setParam('access_type', 'offline')
    .setParam('prompt', 'consent');
};
The createZohoPaymentSession function is used to create a new payment session. It takes the amount as a parameter and returns the payment session details which are then passed to the Zoho Payments widget on the client side.
const createZohoPaymentSession = (amount) => {
  const service = getZohoPaymentsService_();
  const baseUrl = 'https://payments.zoho.in/api/v1';
  const apiUrl = `${baseUrl}/paymentsessions?account_id=${ZOHO_PAYMENTS_ACCOUNT_ID}`;
  const response = UrlFetchApp.fetch(apiUrl, {
    method: 'post',
    payload: JSON.stringify({ amount, currency: 'INR' }),
    headers: {
      Authorization: `Zoho-oauthtoken ${service.getAccessToken()}`,
      'Content-Type': 'application/json'
    },
    muteHttpExceptions: true
  });
  const result = JSON.parse(response.getContentText());
  const { message, payments_session } = result;
  return message === 'success'
    ? {
        account_id: ZOHO_PAYMENTS_ACCOUNT_ID,
        api_key: ZOHO_ACCOUNT_API_KEY,
        merchant_name: ZOHO_MERCHANT_NAME,
        session_id: payments_session.payments_session_id,
        order_amount: payments_session.amount
      }
    : { error: message };
};
You can find the complete code on GitHub.